Learning ZFS
I've been using TrueNAS Core for a few years now. I am about to switch to a TrueNAS Scale VM on Proxmox. TrueNAS will still have real hardware access to the disk controller and reuse the old disks. To be well prepared I wanted to have some practice with ZFS on my Mac. During that practice, I got hooked. This is what Time Machine tried to be! And it has a much superior UI – one that is scriptable by nature.
Installation
I installed OpenZFS via brew and allowed the loading of the required kext. You need to change the security policy of your system for this. Boot into recovery mode start Startup Security Utility and change Full Security to Allow user management of kernel extensions from identified developers. After you restart, you can verify that the OpenZFS kext is loaded via the following command: kextstat | grep -v com.apple. This will list all kernel extensions whose names do not begin with 'com.apple'.
The Playground
I guess you don't have a bunch of high performing disks lying around and even if you had, I'd hope you'd be too lazy to connect them. Let's build four disks from files:
mkfile 1G a-disk b-disk c-disk d-disk
You could use these files immediately as ZFS vdevs, but follow me and attach them via hdiutil to your Mac. It's easier to simulate failing hardware that way. Let's attach the first three for now.
hdiutil attach -imagekey diskimage-class=CRawDiskImage -nomount $(pwd)/a-disk
hdiutil attach -imagekey diskimage-class=CRawDiskImage -nomount $(pwd)/b-disk
hdiutil attach -imagekey diskimage-class=CRawDiskImage -nomount $(pwd)/c-disk
On my system that gave me /dev/disk6, /dev/disk7, /dev/disk8.
ZFS Pools & File systems
Let's build a ZFS pool on disk6:
sudo zpool create tank /dev/disk6
Now we have a ZFS pool called tank AND a ZFS file system called tank which is the root file system of that pool. Let's create another file system for our experiments:
sudo zfs create tank/oliver
and gives permission to the local user oliver:
sudo chown oliver: /Volumes/tank/oliver
Now the user oliver can create, modify and delete files and directories in that file system.
Snapshots and Sending
Let's use disk7 and disk8 to create a mirror that we use for backups:
sudo zpool create backup mirror /dev/disk7 /dev/disk8
Voilà. sudo zpool status should now look like this:
  pool: backup
 state: ONLINE
config:

    NAME        STATE     READ WRITE CKSUM
    backup      ONLINE       0     0     0
      mirror-0  ONLINE       0     0     0
        disk7   ONLINE       0     0     0
        disk8   ONLINE       0     0     0

errors: No known data errors

  pool: tank
 state: ONLINE
config:

    NAME        STATE     READ WRITE CKSUM
    tank        ONLINE       0     0     0
      disk6     ONLINE       0     0     0

errors: No known data errors
Let's touch a file on /Volumes/tank/oliver and then take a snapshot of the file system
touch /Volumes/tank/oliver/Init
sudo zfs snapshot tank/oliver@1
You can list the snapshots with sudo zfs list -t snapshot. It should now look like this:
NAME            USED  AVAIL  REFER  MOUNTPOINT
tank/oliver@1     0B      -  1.73M  -
Now let's create a backup:
sudo zfs send tank/oliver@1 | sudo zfs recv backup/oliver
That's it. There is a file system backup/oliver now that contains the file Init.
Sending Incremental Snapshots
Let's touch another file on tank/oliver and then take another snapshot:
touch /Volumes/tank/oliver/One
sudo zfs snapshot tank/oliver@2
Now let's send only the diff between the first and the second snapshot to the backup pool:
sudo zfs send -RI @1 tank/oliver@2 | sudo zfs recv -Fu backup/oliver
We used different options, here. See me man pages for zfs-send and zfs-recv
Make the backup safer
Let's make our backup even safer:
sudo zfs set copies=2 backup/oliver
This tells the file system backup/oliver to hold two copies of my precious data. How cool is that?
Make the backup smaller
sudo zfs set compression=gzip backup/oliver
Make the backup even more useful
Let's delete the files on tank/oliver and safe a new snapshot to the backup:
rm /Volumes/tank/oliver/*
sudo zfs snapshot tank/oliver@3
sudo zfs send -RI @2 tank/oliver@3 | sudo zfs recv -Fu backup/oliver
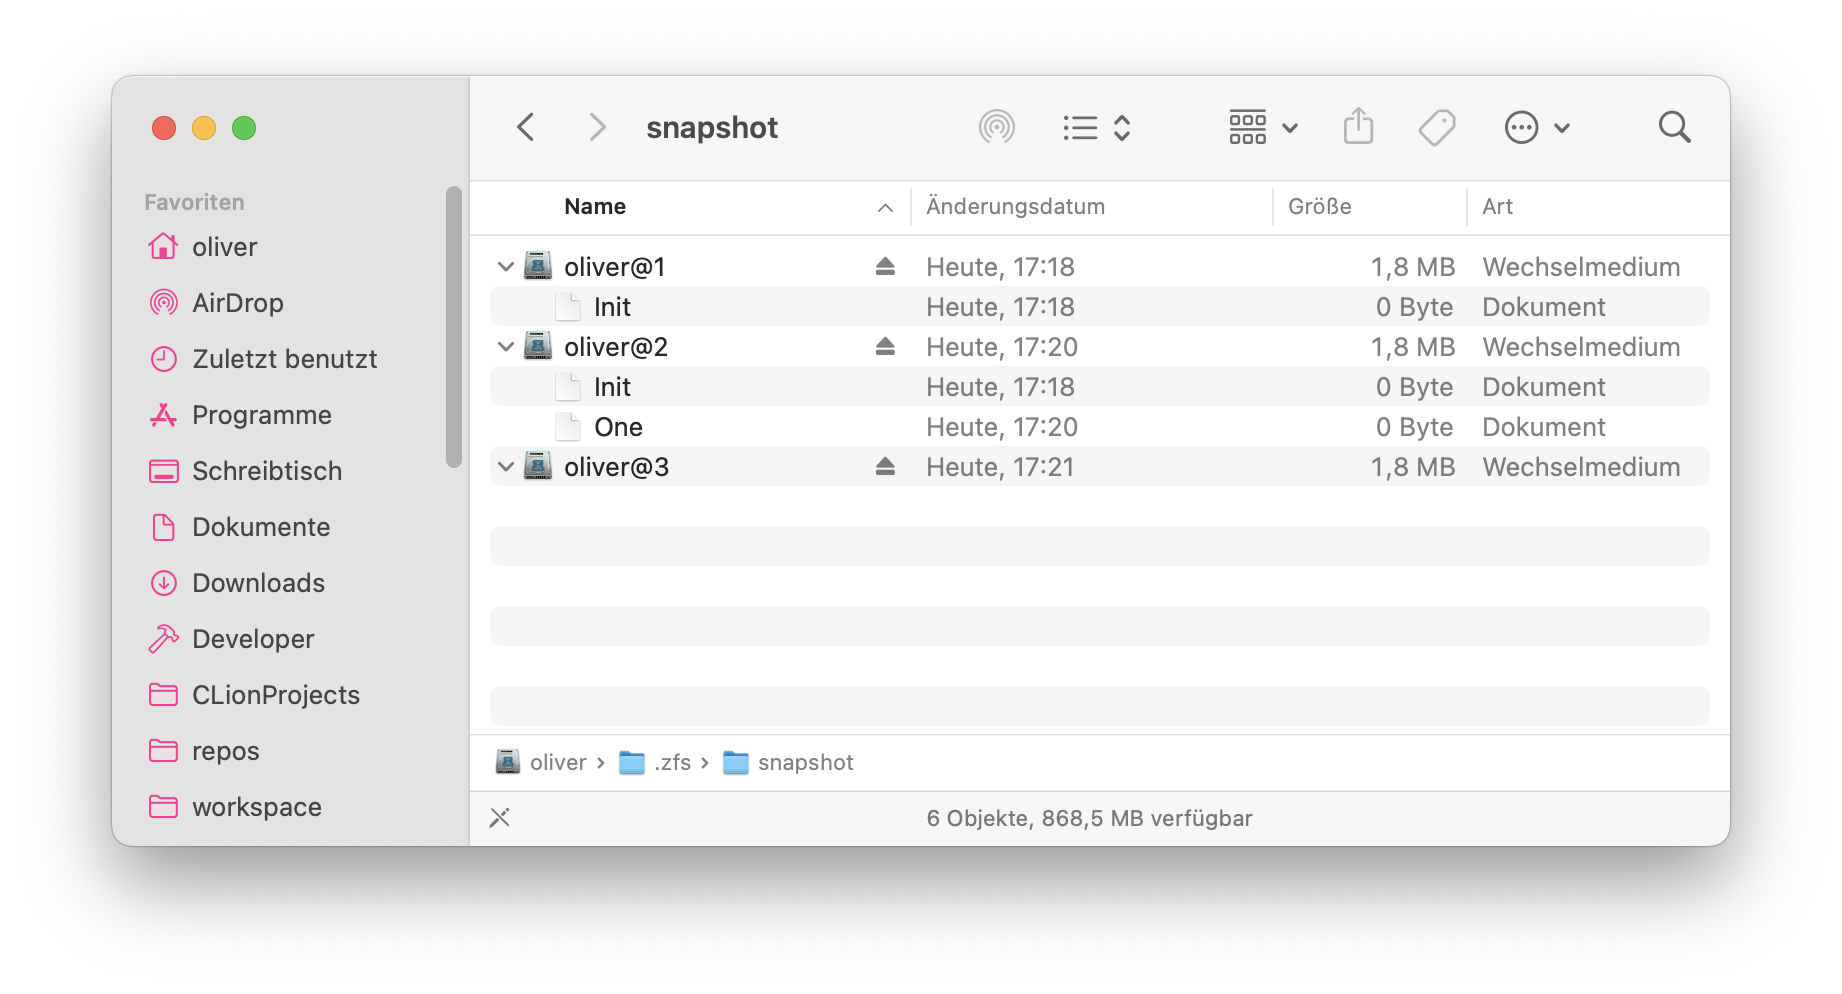
Let's make all of our snapshots visible to the file system backup/oliver:
sudo zfs set snapdir=visible backup/oliver
Now open /Volumes/backup/oliver in Finder and press Cmd + Shift + . to make dot-files visible and navigate to .zfs/snapshot/oliver@2 and you have read-only access to your deleted files.

Simulate a disk-failure
Let's export (think unmount) the pool backup:
sudo zpool export backup
and detach disk8:
hdiutil detach /dev/disk8
Now bring back the pool backup, again:
sudo zpool import backup
sudo zpool status -x should now look like this:
  pool: backup
 state: DEGRADED
status: One or more devices could not be opened.  Sufficient replicas exist for
    the pool to continue functioning in a degraded state.
action: Attach the missing device and online it using 'zpool online'.
   see: https://openzfs.github.io/openzfs-docs/msg/ZFS-8000-2Q
config:

    NAME                                            STATE     READ WRITE CKSUM
    backup                                          DEGRADED     0     0     0
      mirror-0                                      DEGRADED     0     0     0
        media-0BC56ABF-50C7-AF4C-BC93-86D958969282  ONLINE       0     0     0
        1904242345373318257                         UNAVAIL      0     0     0  was /dev/disk8s1

errors: No known data errors
Attach the file d-disk:
hdiutil attach -imagekey diskimage-class=CRawDiskImage -nomount $(pwd)/d-disk
This became /dev/disk10 on my system. Let's use it to replace the unavailable vdev in backup:
sudo zpool replace backup 1904242345373318257 /dev/disk10
Done. sudo zpool status -x shows all pools are healthy.
  pool: backup
 state: ONLINE
  scan: resilvered 4.59M in 00:00:00 with 0 errors on Tue Feb 13 15:57:51 2024
config:

    NAME                                            STATE     READ WRITE CKSUM
    backup                                          ONLINE       0     0     0
      mirror-0                                      ONLINE       0     0     0
        media-0BC56ABF-50C7-AF4C-BC93-86D958969282  ONLINE       0     0     0
        disk10                                      ONLINE       0     0     0

errors: No known data errors

  pool: tank
 state: ONLINE
config:

    NAME        STATE     READ WRITE CKSUM
    tank        ONLINE       0     0     0
      disk6     ONLINE       0     0     0

errors: No known data errors
disk10 will become something like media-xxxx when you export and import the pool backup.
Addendum
Just for reference. If you want to see the mapping between gptids and classic device names on FreeBSD use glabel status. In macOS this is shown by diskutil list or diskutil info. diskutil info /dev/disk7s1 shows 0BC56ABF-50C7-AF4C-BC93-86D958969282 which matches the media-id of the first disk in the pool backup.