Create a document based editor with xib files and swifty cocoa bindings
While learning how to write really good Mac Apps I figured that I simply cannot rely on SwiftUI alone, just yet. SwiftUI is really cool but AppKit has so much to offer and SwiftUI still lacks a few bits and pieces on the Mac. If you're interested in building a document based app in SwiftUI, Gui Rambo has a nice article Creating document-based apps using SwiftUI.
Create the App
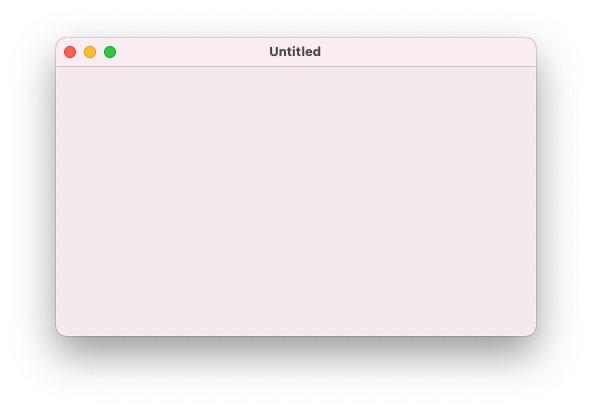
While I do like to use Interface Builder sometimes I didn't want to use Storyboards, here. So let's start by creating a "Document App" and choose XIB for the interface type. If you run the app you should see something like this:

We want do do things a little bit different so go ahead an delete Document.xib. Let's create two Controllers. One NSWindowController and one NSViewController that we will use to present the NSTextView.
Create the WindowController
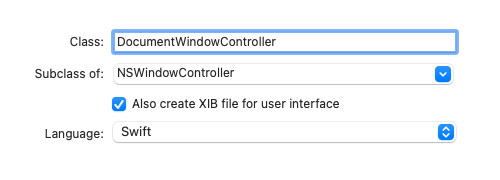
So press CMD-N choose Cocoa Class and name it DocumentWindowController. Make it a subclass of NSWindowController and check Also create XIB file.

Rename the DocumentWindowController.xib to Document.xib.
Create the ViewController
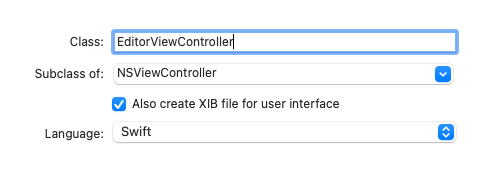
Press CMD-N choose Cocoa Class and name it EditorViewController. Make it a subclass of NSViewController and check Also create XIB file.

Create the model
Create a new file Content.swift with the following content:
import Foundation

public class Content: NSObject {
    @objc dynamic var contentString: String

    public init(contentString: String) {
        self.contentString = contentString
    }
}

extension Content {
    func read(from data: Data) {
        contentString = String(bytes: data, encoding: .utf8) ?? ""
    }

    func data() -> Data? {
        contentString.data(using: .utf8)
    }
}
Since we want to use Cocoa Bindings the contentString variable needs to be accessible from the Objective-C runtime. @objc makes the var available to Objective-C and dynamic chooses dynamic dispatch instead of static dispatch.
Edit the Document class
Every Document needs its own NSWindowController. Remember how we deleted the original Document.xib that came with the template? Since we renamed the xib that came with our DocumentWindowController to Document.xib we can still start the app. But our DocumentWindowController will not be loaded.
To prove: Set a breakpoint to windowDidLoad in DocumentWindowController.
So although the "File's Owner" propety of our renamed Document.xib still points to our controller, that does not mean that the controller gets loaded. That's not how this works. Even if you would rename the xib back to its original name and change the var windowNibName in Document to return the right name the breakpoint would still not be hit.
Let's change that: First delete the override of the var windowNibName from the Document. Now let's override the function makeWindowControllers:
override func makeWindowControllers() {
    let windowController = DocumentWindowController(windowNibName: "Document")
    addWindowController(windowController)
}
If you build and run again you will now hit the breakpoint.
Hook up the EditorViewController
Add another line to the funtion makeWindowControllers:
windowController.contentViewController = EditorViewController()
You don't need to specify the nibName here, if it equals the NSViewControllers name. Want proove again? Drop a "Hello World" label in the EditorViewController.xib and restart the app. 😀
Before we continue to create the UI let's finish the work on the Document class.
Add a memeber that will hold the model:
@objc var content = Content(contentString: "")
Set the model as the ViewControllers representedObject. So change makeWindowControllers to this:
override func makeWindowControllers() {
    let windowController = DocumentWindowController(windowNibName: "Document")
    addWindowController(windowController)
    let editorViewController = EditorViewController()
    editorViewController.representedObject = content
    windowController.contentViewController = editorViewController
}
Last replace the body of the data() -> Data function with
return content.data() ?? Data()
and the body of the read() function with:
content.read(from: data)
That's it for the Document class.
Wire up the EditorViewController
Delete the label (if you added it) from the nib and replace it with a NSTextView that you constrain to all for edges. In the Bindings Inspector select value and bind it to: "File's Owner" use self.representedObject.contentString as the "Model Key Path" and check "Continuously Update value". If you want you can add a didSet to the contentString var in Content to see it updates like this:
@objc dynamic var contentString: String {
    didSet {
        print(contentString)
    }
}
If you build and run now you'll see what you enter in the TextView beeing printed to the console.
Let's try saving. Cool! What about opening a document? Restart the app and try opening the file. Works too. How neat :-D
More Swifty Bindings
Go ahead and delete the binding from the connections inspector. Thanks to Lucas Derraugh's fantastic youtube series about Apple Programming I learned about a much nicer and swiftier way.
Create an outlet to the NSTextView in the EditorViewController and add the following line to viewDidLoad():
textView.bind(.value, to: representedObject!, withKeyPath: "contentString", options: [NSBindingOption.continuouslyUpdatesValue: true])
We're immediately back in business. Value is still bound to contentString and through the options dictionary we still tell the NSTextView to send updates continuously. But Lucas had another cool idea:
Create the following extentions on NSObject:
extension NSObject {
    func bind<Root, Value>(_ binding: NSBindingName, to observable: Root, keyPath: KeyPath<Root, Value>, options: [NSBindingOption: Any]? = nil) {
        guard let kvcKeyPath = keyPath._kvcKeyPathString else {
            print("KeyPath does not contain @objc exposed values")
            return
        }
        bind(binding, to: observable, withKeyPath: kvcKeyPath, options: options)
    }
}
With that in place we can get rid of the stringly typed keyPath on the call side and use a Swift KeyPath:
 if let content = representedObject as? Content {
            textView.bind(.value, to: content, keyPath: \.contentString, options: [NSBindingOption.continuouslyUpdatesValue: true])
        }
That's much better 💪
Are you interested in doing the above completely in code? Or use Combine to bind to the model? Let's chat.